Perimetry
Workflow-oriented
The key for reliable results
Selection of eye & trial lens
Step 1
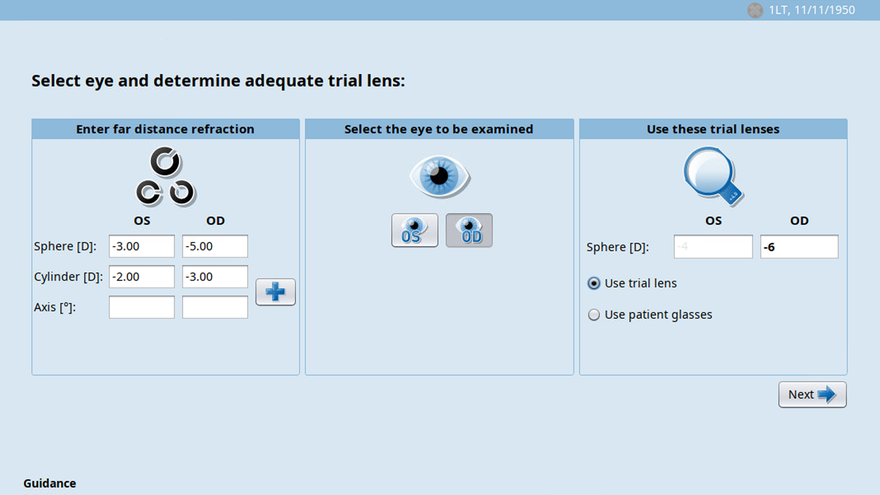
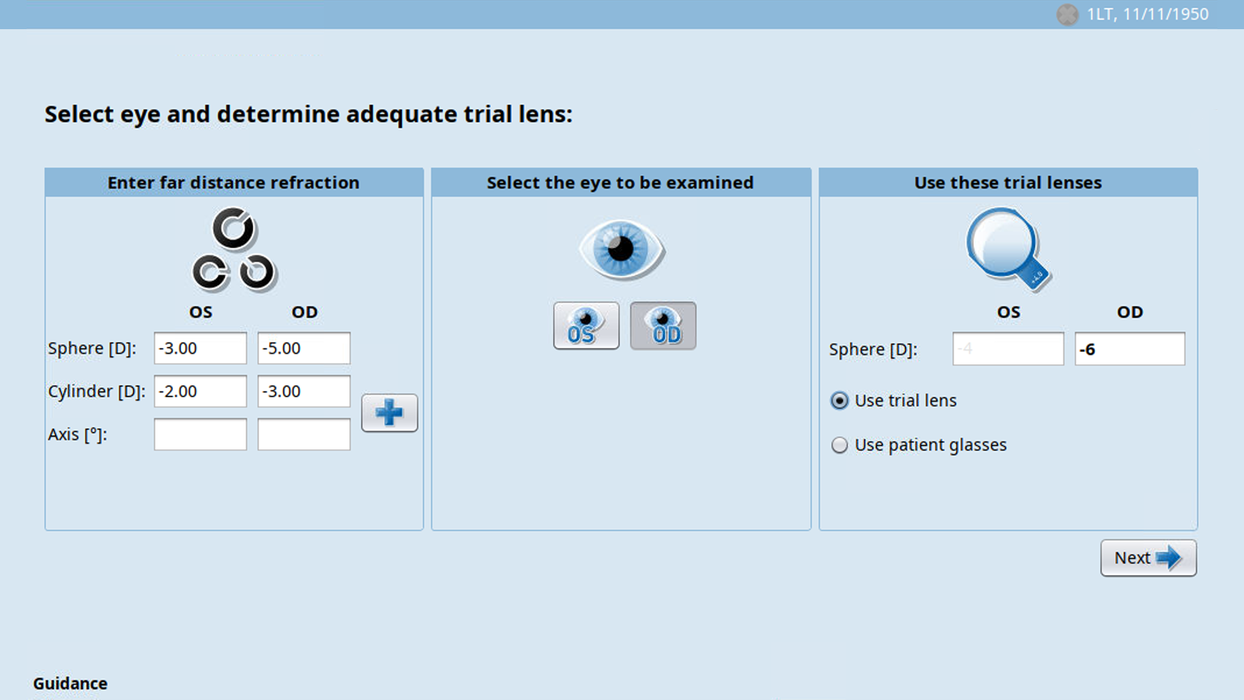
After starting the examination by pressing the perimetry symbol on the right, the patient’s far distance refraction is manually entered or automatically imported from the EMR. After selecting the eye to be tested, the software automatically calculates the adequate trial lens to use, taking the patient’s age into account.
Selection of test parameters
Step 2
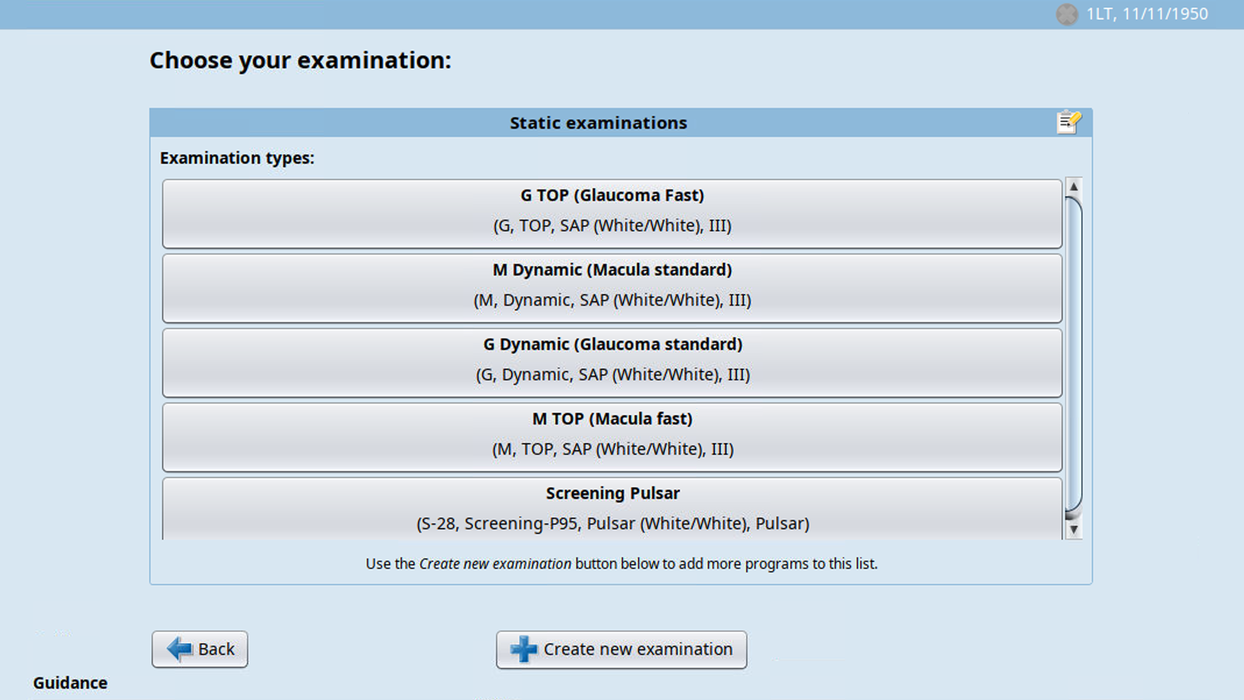
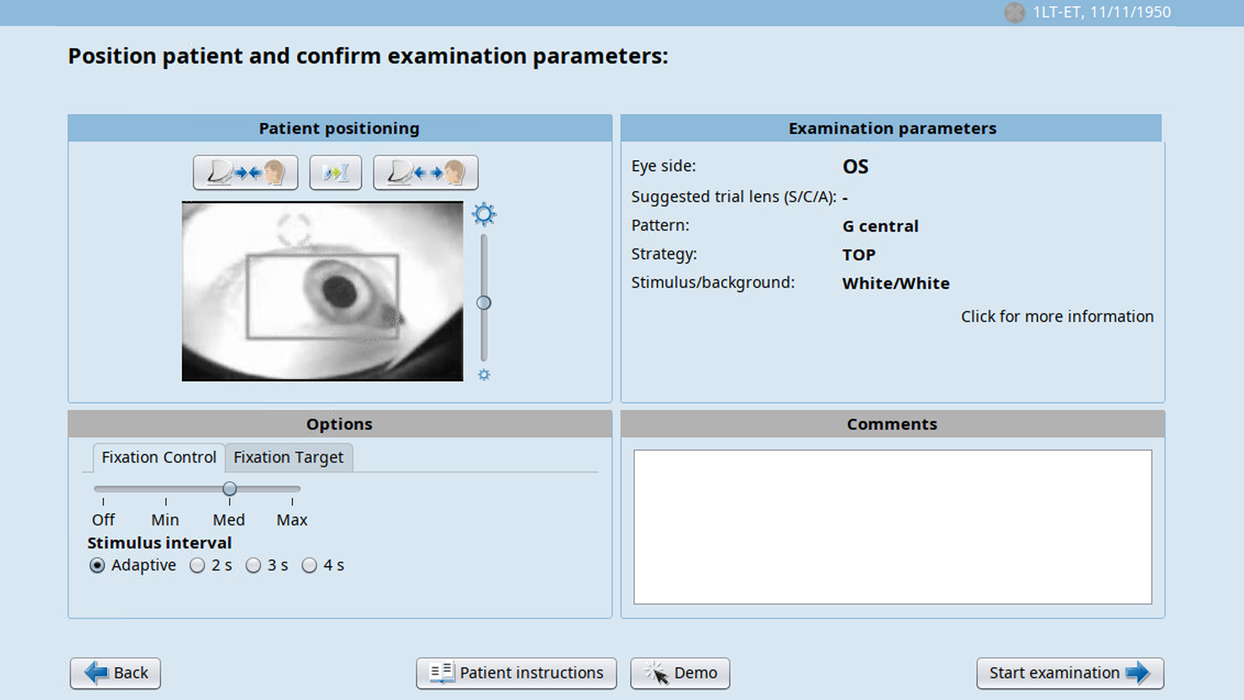
Test parameters are selected with just one click. The list of available options can be individualized to just show the standard testing protocols of a clinic for improved consistency between tests.
Patient positioning & review of test parameters
Step 3
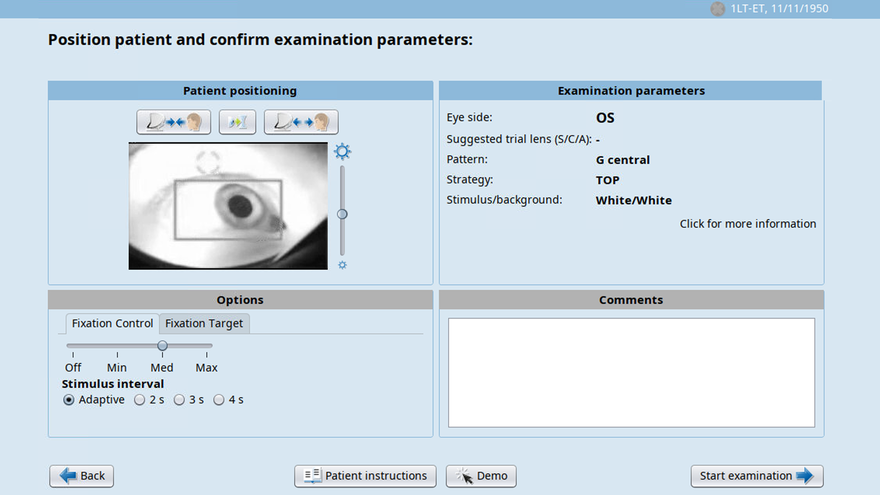
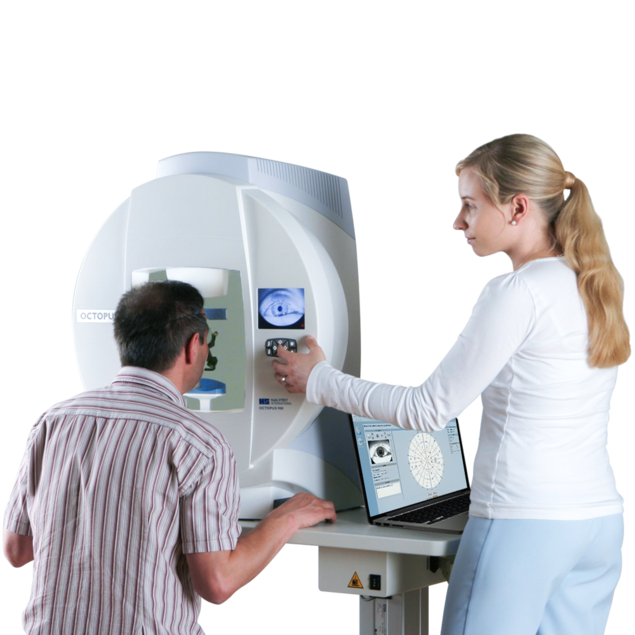
Consequently, the patient’s position needs to be adjusted and confirmed using the video monitor of the patient’s eye. For inexperienced patients, demo stimuli can be presented to visually support patient instructions. Before the test is started, all test parameters are once more available for review.
Patient instructions in multiple langages
Step 3—optional
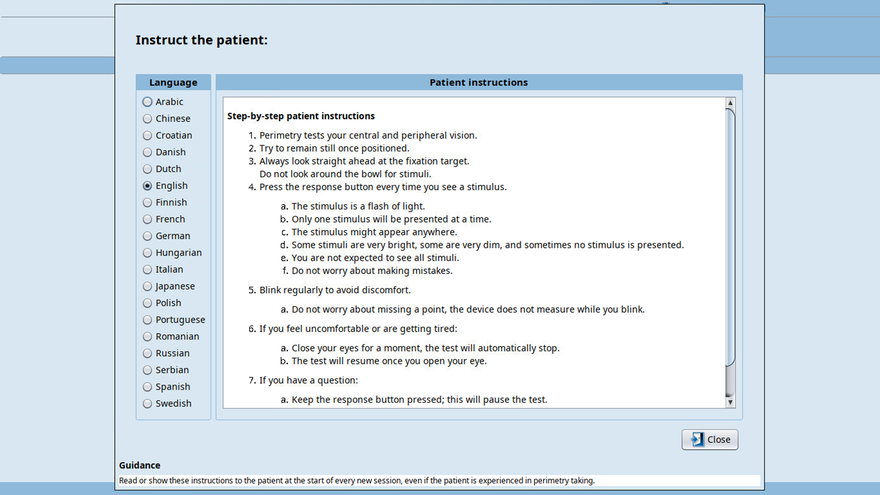
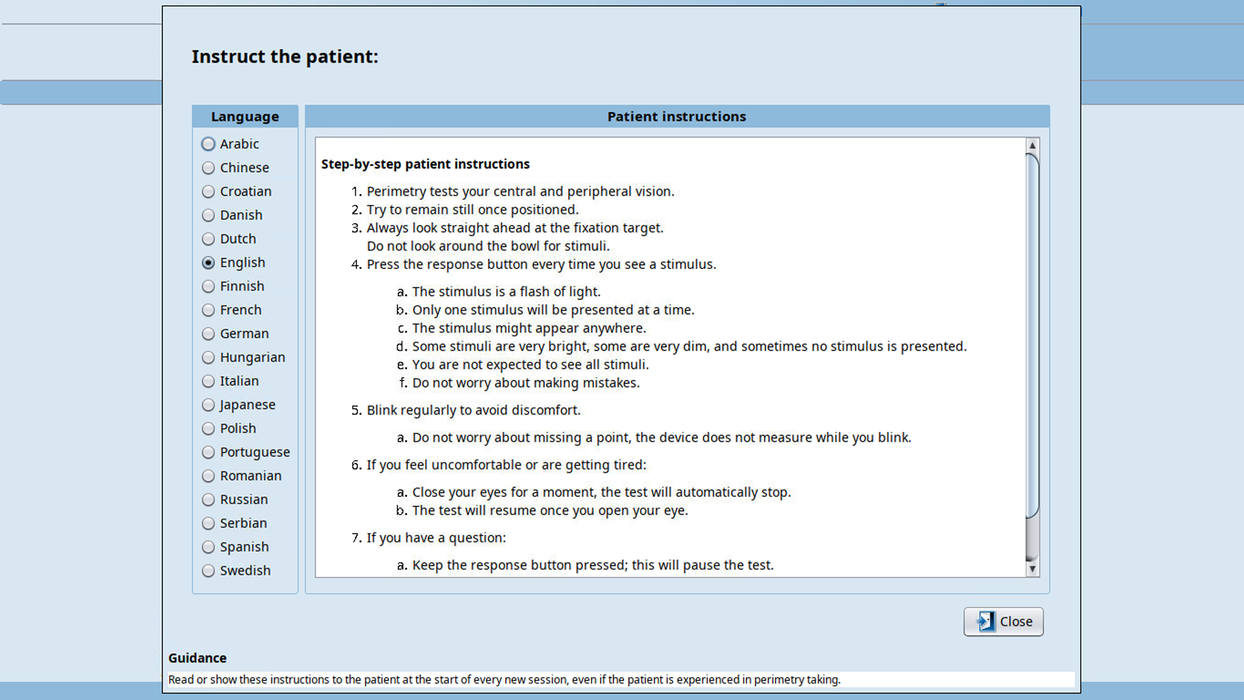
Optionally, patient instructions can be displayed in many languages. This is helpful for inexperienced patients and when patients are examined who do not speak the local language.
Patient monitoring
Step 4
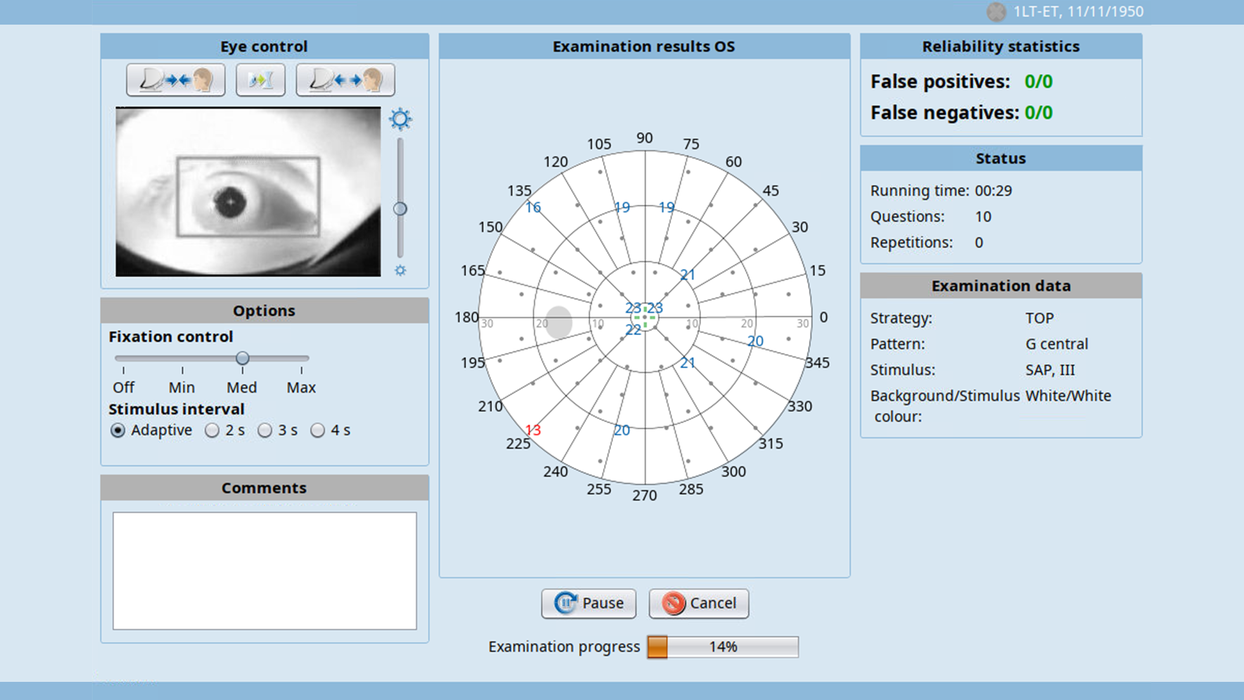
During the test, the patient’s eye position is monitored on the video monitor. False positive and false negative results out of normal ranges are flagged with two colors and the progress of the test is shown.
Finishing examination & next steps
Step 5
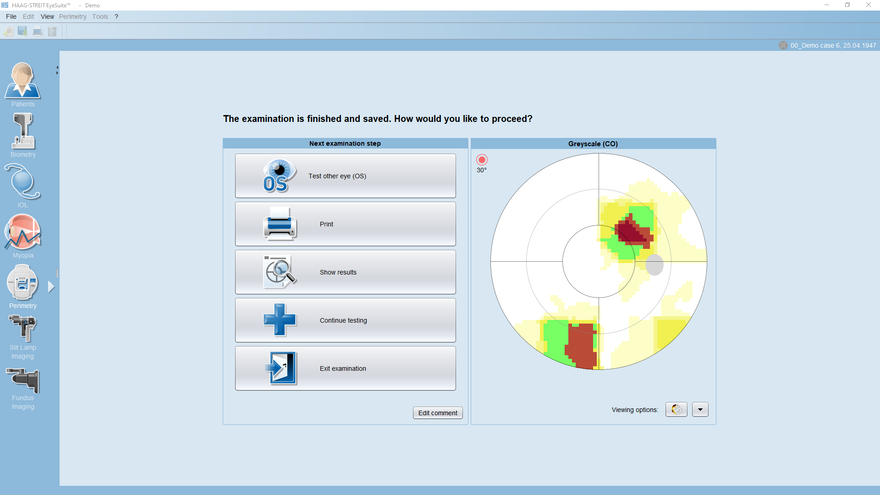
After finishing the examination, there are multiple options on how to proceed: the second eye may be tested, the results may be printed or displayed, another test methodology may be added to the same eye or one may simply wish to leave the examination and return to the patient screen.

Selection of eye & trial lens

Selection of test parameters

Patient positioning & review of test parameters

Patient instructions in multiple langages

Patient monitoring

Finishing examination & next steps

